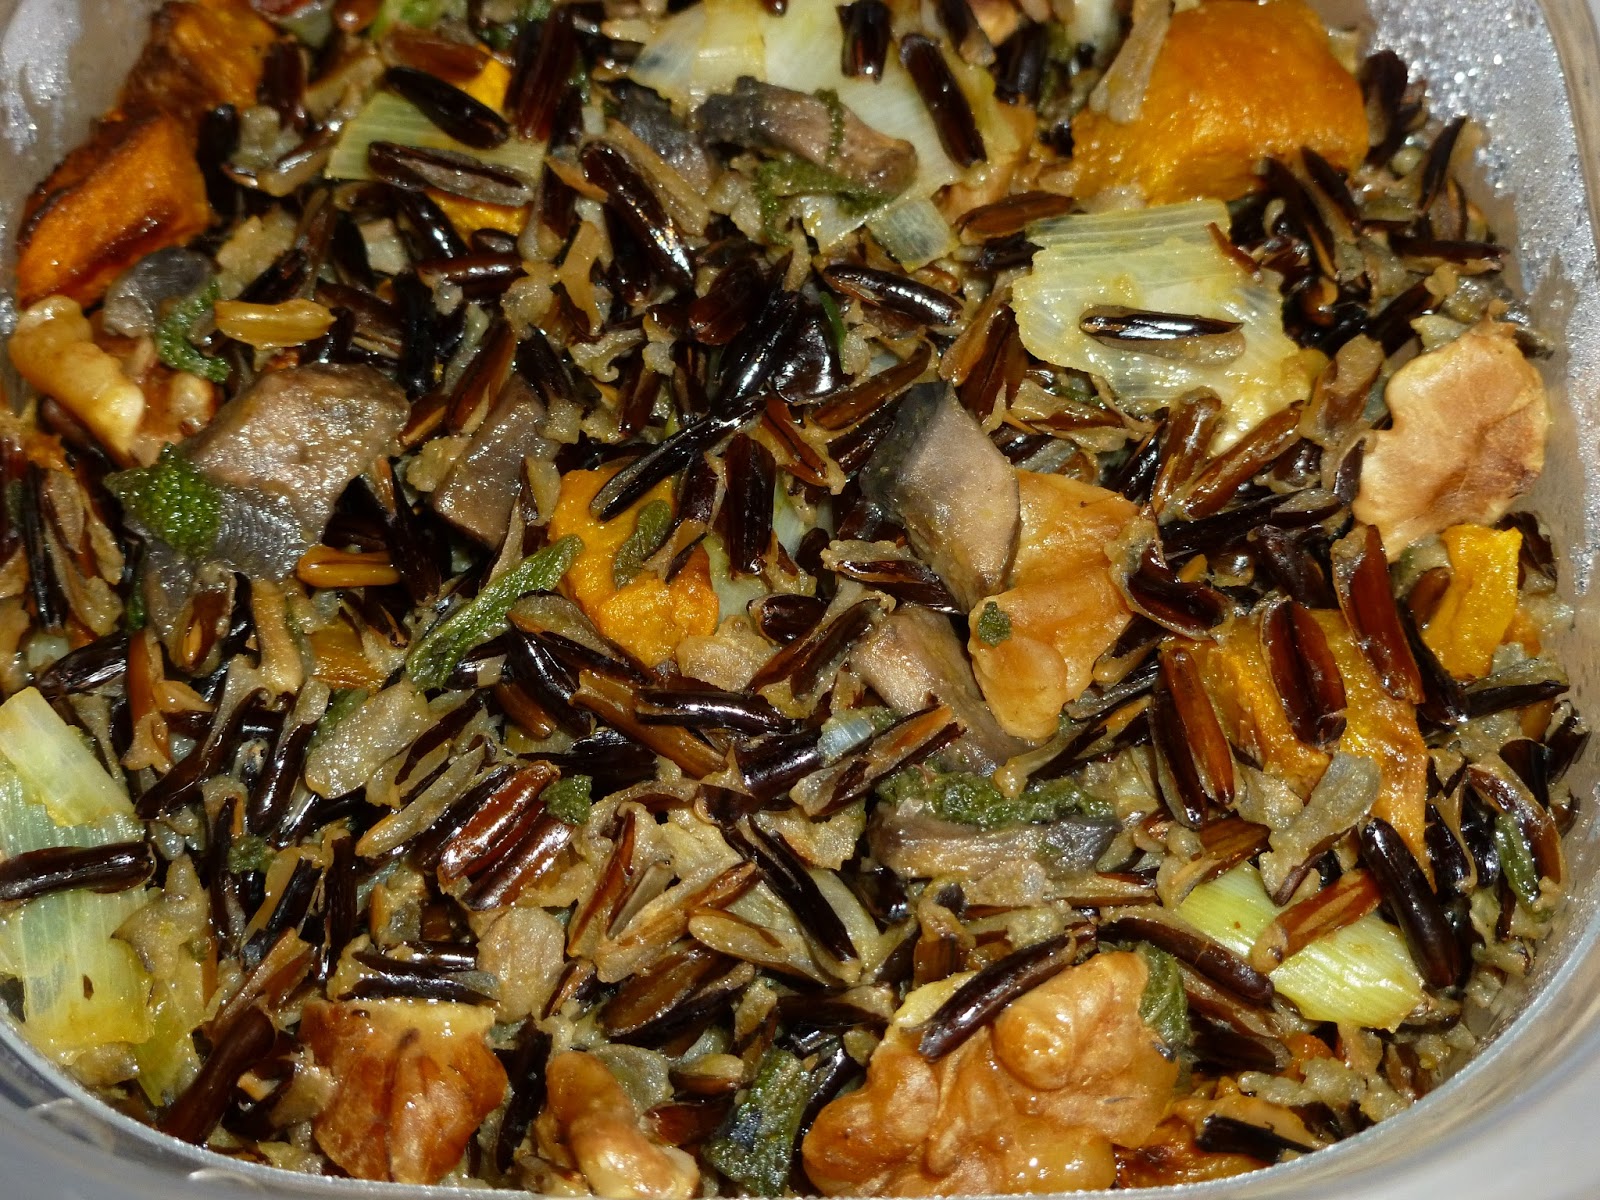
1 butternut squash, peeled and diced
2 cups sprouted rice blend, uncooked
1 Tbs ground sage
1 Tbs rosemary, crushed
1 cup pinot grigio
1 leek, white and light green parts chopped
1 lb haricot verts, trimmed and cut into bite-sized pieces
1 cup walnuts, toasted
1) Preheat the oven to 400F. Grease a rimmed baking sheet and add butternut squash. Spray with olive oil cooking spray and bake for 45-50 minutes, until browned.
2) Meanwhile, cook rice according to package directions, typically 25-30 minutes. Combine cooked rice with sage and rosemary.
3) In a large saute pan, mix the leeks and pinot grigio. Bring to a boil and allow wine to reduce to about 1/4 cup, about 7-10 minutes. Add haricot verts and cover, steaming the beans until bright green, 3-5 minutes.
4) To serve, make a bed of rice and top with haricot verts, butternut squash and toasted walnuts.
Review: I've been chronically fatigued and disinterested in cooking as of late. This has led to eating a lot of crap. So, I pledged to do things differently this week and committed to cooking. However, my disinterest led to not looking for new recipes. I instead grabbed random produce at the grocery store this weekend. I spent much of today pondering what I could make with the ingredients I owned and this is what I came up with. It was unbelievably delicious. The tanginess of the wine reduction was such a great counter to the sweetness of the butternut squash and then toasty flavor of the walnuts was a nice finish. The haricot verts/leeks/rice were a nice base to such a wonderful flavor combination. Yum!!
Monday, December 14, 2015
Wednesday, November 25, 2015
Spiced Mixed-Nut Pie
3 eggs
3/4 cup dark brown sugar
1/2 cup light corn syrup
2 Tbs spiced rum
1/2 tsp cinnamon
1/2 tsp ground cloves
1/4 tsp ground allspice
1/4 tsp ground ginger
1/2 tsp vanilla extract
1/2 tsp Instant Clearjel
3 cups salted, roasted, mixed nuts
1) Preheat oven to 375F. Set aside pie plate with prepared crust of your choosing.
2) Beat the eggs with the brown sugar, corn syrup, rum, cinnamon, cloves, allspice, ginger, vanilla extract and Clearjel, in a large bowl. Stir in the nuts. Pour pie mixture into prepare pie crust.
3) Bake for 45-50 minutes, until the pie is mostly set. Let cool completely.
Review: This looked like such a fun pie to make for the holidays. It originally called for dark rum, but couldn't find any in local liquor stores, at least none in a size less than a liter! So, I used a bit of Captain Morgan's, though I considered using an espresso rum. I also liked using Trader Joe's mix of nuts, since it included macadamia nuts! Yum. So, it did seem similar to a pecan pie, but was so much more exotic. I looooooooved this pie!!
Before baking:
After:
Adapted from:
http://www.realsimple.com/food-recipes/browse-all-recipes/spiced-mixed-nut-pie
3/4 cup dark brown sugar
1/2 cup light corn syrup
2 Tbs spiced rum
1/2 tsp cinnamon
1/2 tsp ground cloves
1/4 tsp ground allspice
1/4 tsp ground ginger
1/2 tsp vanilla extract
1/2 tsp Instant Clearjel
3 cups salted, roasted, mixed nuts
1) Preheat oven to 375F. Set aside pie plate with prepared crust of your choosing.
2) Beat the eggs with the brown sugar, corn syrup, rum, cinnamon, cloves, allspice, ginger, vanilla extract and Clearjel, in a large bowl. Stir in the nuts. Pour pie mixture into prepare pie crust.
3) Bake for 45-50 minutes, until the pie is mostly set. Let cool completely.
Review: This looked like such a fun pie to make for the holidays. It originally called for dark rum, but couldn't find any in local liquor stores, at least none in a size less than a liter! So, I used a bit of Captain Morgan's, though I considered using an espresso rum. I also liked using Trader Joe's mix of nuts, since it included macadamia nuts! Yum. So, it did seem similar to a pecan pie, but was so much more exotic. I looooooooved this pie!!
Before baking:
After:
Adapted from:
http://www.realsimple.com/food-recipes/browse-all-recipes/spiced-mixed-nut-pie
Thanksgiving Dressing (original recipe)
2 lb pumpkin, peeled and diced
16oz bag wild rice
4 cups vegetable broth
2 Tbs olive oil
1 leek, white and light green parts chopped
1 pkg fresh sage, chopped
2 portabello caps, chopped
2 cups walnuts, toasted
1) Preheat oven to 400F. On a rimmed baking sheet, toss pumpkin with 1 Tbs olive oil. Roast in oven for 45-50 minutes, until browned and tender.
2) Meanwhile, combine wild rice and vegetable broth in a dutch oven. Heat on the stovetop over medium-high heat, until boiling. Reduce heat to medium-low, cover and cook for 45-50 minutes (until broth is fully absorbed).
3) Once the pumpkin and wild rice has been cooking for 30 minutes, bring out a saute pan. Combine 1 Tbs olive oil, leeks, mushrooms and sage. Heat over medium-high heat for 8-10 minutes, until most of the water from the mushrooms has evaporated.
4) Toss all the ingredients together in a large bowl, serve warm.
Review: Ha! I made an original recipe, just from the top of my head. Thank goodness it turned out so wonderfully delicious, or I'd have nothing to eat for the holiday. This made a tremendous amount of food, so there's plenty for me and some to share.
16oz bag wild rice
4 cups vegetable broth
2 Tbs olive oil
1 leek, white and light green parts chopped
1 pkg fresh sage, chopped
2 portabello caps, chopped
2 cups walnuts, toasted
1) Preheat oven to 400F. On a rimmed baking sheet, toss pumpkin with 1 Tbs olive oil. Roast in oven for 45-50 minutes, until browned and tender.
2) Meanwhile, combine wild rice and vegetable broth in a dutch oven. Heat on the stovetop over medium-high heat, until boiling. Reduce heat to medium-low, cover and cook for 45-50 minutes (until broth is fully absorbed).
3) Once the pumpkin and wild rice has been cooking for 30 minutes, bring out a saute pan. Combine 1 Tbs olive oil, leeks, mushrooms and sage. Heat over medium-high heat for 8-10 minutes, until most of the water from the mushrooms has evaporated.
4) Toss all the ingredients together in a large bowl, serve warm.
Review: Ha! I made an original recipe, just from the top of my head. Thank goodness it turned out so wonderfully delicious, or I'd have nothing to eat for the holiday. This made a tremendous amount of food, so there's plenty for me and some to share.
Sunday, November 8, 2015
Sage & Maple Roasted Chickpeas, with Kale & Mashed Sweet Potates
15oz can chickpeas, rinsed and dried
2 Tbs olive oil, divided
2 Tbs maple syrup, divided
2 Tbs fresh sage leaves, chopped
Kosher salt and black pepper
2 medium sweet potatoes
1 bunch kale stems removed, chopped into 2-inch pieces
1) Preheat oven to 400F. Grease a large, rimmed baking sheet with olive oil spray.
2) In a medium mixing bowl, combine 1 Tbs olive oil and 1 Tbs maple syrup. Add the sage and chickpeas, toss to combine.
3) Pour chickpea mixture onto the rimmed baking sheet. Season with salt and pepper, if desired. Roast until the chickpeas are browned and crispy, about 30 minutes.
4) About 20 minutes into the chickpeas cooking, pierce the sweet potatoes all over. Place on a paper towel in the microwave. Microwave on high about 7-8 minutes, until soft.
5) When the sweet potatoes have cooled slightly, peel the skin off with your hands. Divide the sweet potatoes among your serving bowls. Mash each with a fork, then drizzle with remaining 1 Tbs of olive oil and 1 Tbs maple syrup, stir to combine. Season with salt and pepper, if desired.
6) Toss the kale with the chickpeas on the rimmed baking sheet. Spray with olive oil cooking spray and put back into oven for another 5-7 minutes, until kale has wilted and crisped.
7) Top mashed sweet potatoes with chickpea and kale mixture. Serve immediately.
Review: I hate cleaning kale, so I bought a bag of prewashed, prechopped kale. However, it doesn't remove the stems. This made for a messy meal as I had to spit out the stems (totally not edible). I also believe my kale didn't crisp up because of the stems. Oops, big mistake. Regardless, this was really tasty. Sweet potatoes and maple syrup are always a great flavor combination. Then, the chickpeas caramelized (not dried out like chickpea snacks) and the kale balanced out the sweetness. It's a great fall dish!
Adapted from:
http://www.buzzfeed.com/christinebyrne/sage-and-maple-roasted-chickpeas-with-crispy-kale-and-sweet?bffb&utm_term=.iug7680LE#.xclPm3BzD
2 Tbs olive oil, divided
2 Tbs maple syrup, divided
2 Tbs fresh sage leaves, chopped
Kosher salt and black pepper
2 medium sweet potatoes
1 bunch kale stems removed, chopped into 2-inch pieces
1) Preheat oven to 400F. Grease a large, rimmed baking sheet with olive oil spray.
2) In a medium mixing bowl, combine 1 Tbs olive oil and 1 Tbs maple syrup. Add the sage and chickpeas, toss to combine.
3) Pour chickpea mixture onto the rimmed baking sheet. Season with salt and pepper, if desired. Roast until the chickpeas are browned and crispy, about 30 minutes.
4) About 20 minutes into the chickpeas cooking, pierce the sweet potatoes all over. Place on a paper towel in the microwave. Microwave on high about 7-8 minutes, until soft.
5) When the sweet potatoes have cooled slightly, peel the skin off with your hands. Divide the sweet potatoes among your serving bowls. Mash each with a fork, then drizzle with remaining 1 Tbs of olive oil and 1 Tbs maple syrup, stir to combine. Season with salt and pepper, if desired.
6) Toss the kale with the chickpeas on the rimmed baking sheet. Spray with olive oil cooking spray and put back into oven for another 5-7 minutes, until kale has wilted and crisped.
7) Top mashed sweet potatoes with chickpea and kale mixture. Serve immediately.
Review: I hate cleaning kale, so I bought a bag of prewashed, prechopped kale. However, it doesn't remove the stems. This made for a messy meal as I had to spit out the stems (totally not edible). I also believe my kale didn't crisp up because of the stems. Oops, big mistake. Regardless, this was really tasty. Sweet potatoes and maple syrup are always a great flavor combination. Then, the chickpeas caramelized (not dried out like chickpea snacks) and the kale balanced out the sweetness. It's a great fall dish!
Adapted from:
http://www.buzzfeed.com/christinebyrne/sage-and-maple-roasted-chickpeas-with-crispy-kale-and-sweet?bffb&utm_term=.iug7680LE#.xclPm3BzD
Sunday, October 25, 2015
Pickled Snap Peas
3/4 lb snap peas, ends removed
3 cloves garlic, peeled
1 Tbs pink Himalayan salt
2 cups water
fresh dill, several weeks later
1) Dissolve the salt in the water, at room temperature. Never use iodized salt to make this brine, as it will prevent the fermentation process from occurring.
2) Stuff snap peas and garlic into a quart mason jar. Try to wedge them in tightly. Place a pickle pebble on top, to keep them below the brine.
3) Pour brine in carefully and make sure there's enough to cover all the vegetables. Cover with an airlock lid.
4) Set aside in a cool place, out of direct sun. After 2-3 weeks, test the ph. Once it's below 4, wedge in the fresh dill and place it in the fridge. Remove the dill after one week and enjoy!
Review: I began this recipe on 9/12/2015. On 10/14/2015, the ph finally got below 4 and I could put the dill in. The dill was removed on 10/25/2015 and we got to enjoy this goodness. These are definitely pickles. They're dilly, they're salty, they're crisp. And, oddly addictive. I would never have expected these to be so good, but they're amazing. They're also full of all sorts of prebiotics and probiotics, since they're lacto-fermented.
Adapted from:
http://phickle.com/we-can-phickle-that-dilly-snaps/
3 cloves garlic, peeled
1 Tbs pink Himalayan salt
2 cups water
fresh dill, several weeks later
1) Dissolve the salt in the water, at room temperature. Never use iodized salt to make this brine, as it will prevent the fermentation process from occurring.
2) Stuff snap peas and garlic into a quart mason jar. Try to wedge them in tightly. Place a pickle pebble on top, to keep them below the brine.
3) Pour brine in carefully and make sure there's enough to cover all the vegetables. Cover with an airlock lid.
4) Set aside in a cool place, out of direct sun. After 2-3 weeks, test the ph. Once it's below 4, wedge in the fresh dill and place it in the fridge. Remove the dill after one week and enjoy!
Review: I began this recipe on 9/12/2015. On 10/14/2015, the ph finally got below 4 and I could put the dill in. The dill was removed on 10/25/2015 and we got to enjoy this goodness. These are definitely pickles. They're dilly, they're salty, they're crisp. And, oddly addictive. I would never have expected these to be so good, but they're amazing. They're also full of all sorts of prebiotics and probiotics, since they're lacto-fermented.
Adapted from:
http://phickle.com/we-can-phickle-that-dilly-snaps/
Sunday, September 20, 2015
Dark Chocolate Macaroons
4oz unsweetened dark chocolate, chopped
8oz unsweetened, shredded coconut
6oz sweetened, shredded coconut
2/3 cup sugar
6 Tbs cocoa powder
3 large egg whites
1/4 tsp salt
1/2 tsp vanilla extract
1) Heat oven to 325F. Line two large baking sheets with parchment paper.
2) Heat approximately half of the dark chocolate in a small saucepan, until just melted. Then, off the heat, stir in the remaining bits of dark chocolate. Stir until smooth. The residual heat should be enough to melt them and leave the mixture lukewarm; if it's not, heat the mixture again until just melted, but not very hot.
3) In a food processor, blend the coconut for one full minute. Add sugar and cocoa powder, blend another full minute. Add egg whites, salt and vanilla. Blend until combined, then add the melted chocolate until smooth.
4) With a tablespoon measure or cookie scoop, scoop batter into 1-inch mounds. You can arrange the cookies fairly close together, as they don't spread but just puff a bit.
5) Bake cookies for 15 minutes, until the macaroons are shiny and just set. Let them rest on the tray for 10 minutes after baking (or you can let them fully cool in place, if you're not in a rush to use the tray again), as they'll be hard to move right out of the oven. They'll firm up as they cool, but still remain softer and less dry inside than traditional macaroons.
6) Optional: They can be dusted with powdered sugar, if desired.
Review: This recipe called for 14oz unsweetened, flaked coconut. However, I had a bag of sweetened and a bag of unsweetened (both from Trader Joe's) that equaled 14oz perfectly. I worried it would make the recipe too sweet, but it was absolutely perfect. I wouldn't make it any other way!! They were densely chocolatey, not too sweet, and oh so moist. I made these for a back to school affair and they got lots of great reviews. This was especially noteworthy, considering I found these fairly easy to make!!
Adapted from:
http://smittenkitchen.com/blog/2014/04/dark-chocolate-coconut-macaroons/?utm_source=feedburner&utm_medium=feed&utm_campaign=Feed%3A+smittenkitchen+%28smitten+kitchen%29
8oz unsweetened, shredded coconut
6oz sweetened, shredded coconut
2/3 cup sugar
6 Tbs cocoa powder
3 large egg whites
1/4 tsp salt
1/2 tsp vanilla extract
1) Heat oven to 325F. Line two large baking sheets with parchment paper.
2) Heat approximately half of the dark chocolate in a small saucepan, until just melted. Then, off the heat, stir in the remaining bits of dark chocolate. Stir until smooth. The residual heat should be enough to melt them and leave the mixture lukewarm; if it's not, heat the mixture again until just melted, but not very hot.
3) In a food processor, blend the coconut for one full minute. Add sugar and cocoa powder, blend another full minute. Add egg whites, salt and vanilla. Blend until combined, then add the melted chocolate until smooth.
4) With a tablespoon measure or cookie scoop, scoop batter into 1-inch mounds. You can arrange the cookies fairly close together, as they don't spread but just puff a bit.
5) Bake cookies for 15 minutes, until the macaroons are shiny and just set. Let them rest on the tray for 10 minutes after baking (or you can let them fully cool in place, if you're not in a rush to use the tray again), as they'll be hard to move right out of the oven. They'll firm up as they cool, but still remain softer and less dry inside than traditional macaroons.
6) Optional: They can be dusted with powdered sugar, if desired.
Review: This recipe called for 14oz unsweetened, flaked coconut. However, I had a bag of sweetened and a bag of unsweetened (both from Trader Joe's) that equaled 14oz perfectly. I worried it would make the recipe too sweet, but it was absolutely perfect. I wouldn't make it any other way!! They were densely chocolatey, not too sweet, and oh so moist. I made these for a back to school affair and they got lots of great reviews. This was especially noteworthy, considering I found these fairly easy to make!!
Adapted from:
http://smittenkitchen.com/blog/2014/04/dark-chocolate-coconut-macaroons/?utm_source=feedburner&utm_medium=feed&utm_campaign=Feed%3A+smittenkitchen+%28smitten+kitchen%29
Sunday, September 13, 2015
Gluten Free Multiseed Bread (original recipe)
1/2 cup + 1 Tbs warm water
4 1/2 Tbs vegan butter
1 tsp apple cider vinegar
1 1/4 cup room temperature hemp milk
1 egg, beaten
3 cups gluten free flour
1 1/2 tsp xanthan gum
1/4 tsp salt
1/8 cup sugar
1 1/2 tsp instant yeast
2 Tbs whole flax seeds
2 Tbs pumpkin seeds
2 Tbs sunflower seeds
2 Tbs amaranth
1) Place all liquid ingredients into the bowl of a bread machine.
2) Place all dry ingredients on top of the liquid ingredients in the bread machine, except the yeast.
3) Make a small well in the middle of the dry ingredients, but not so deep that it touches the liquid ingredients. Add the yeast.
4) Shut the lid and set the machine for a 1.5 lb loaf, on white bread medium settings.
5) Once the bread is done, immediately remove the bread and place on a cooling rack. Gluten free bread does not do well when it stays in the machine on the warm cycle. Wait at least 30 minutes before slicing. Refrigerate leftovers.
Review: I had a recipe that I wanted to use for my first time with a bread machine. However, I couldn't find some of the ingredients and subbed in my own ideas. Halfway through the recipe, I realized the author had developed her own "flour blend" that included important ingredients such as egg, sugar, salt and xanthan gum. The blend also made enough to make 2.5 loaves of bread. Eek, that made the math difficult. I really just gave up on the idea and googled how much I should use in a typical bread recipe. At this point, I realized I had my own original recipe as it wasn't even close to the original anymore. I was also scared it wasn't going to turn out well. I was joyous when I got the below results. It's the best bread texture I've ever experienced with homemade gluten free bread and it was SO TASTY. That said, this recipe will vary greatly based on the brand/mixture of gluten free flour used. I'm really going to try to stop buying the frozen loaves at the store and start making my own loaf each week. Hopefully I can stick with it!!
4 1/2 Tbs vegan butter
1 tsp apple cider vinegar
1 1/4 cup room temperature hemp milk
1 egg, beaten
3 cups gluten free flour
1 1/2 tsp xanthan gum
1/4 tsp salt
1/8 cup sugar
1 1/2 tsp instant yeast
2 Tbs whole flax seeds
2 Tbs pumpkin seeds
2 Tbs sunflower seeds
2 Tbs amaranth
1) Place all liquid ingredients into the bowl of a bread machine.
2) Place all dry ingredients on top of the liquid ingredients in the bread machine, except the yeast.
3) Make a small well in the middle of the dry ingredients, but not so deep that it touches the liquid ingredients. Add the yeast.
4) Shut the lid and set the machine for a 1.5 lb loaf, on white bread medium settings.
5) Once the bread is done, immediately remove the bread and place on a cooling rack. Gluten free bread does not do well when it stays in the machine on the warm cycle. Wait at least 30 minutes before slicing. Refrigerate leftovers.
Review: I had a recipe that I wanted to use for my first time with a bread machine. However, I couldn't find some of the ingredients and subbed in my own ideas. Halfway through the recipe, I realized the author had developed her own "flour blend" that included important ingredients such as egg, sugar, salt and xanthan gum. The blend also made enough to make 2.5 loaves of bread. Eek, that made the math difficult. I really just gave up on the idea and googled how much I should use in a typical bread recipe. At this point, I realized I had my own original recipe as it wasn't even close to the original anymore. I was also scared it wasn't going to turn out well. I was joyous when I got the below results. It's the best bread texture I've ever experienced with homemade gluten free bread and it was SO TASTY. That said, this recipe will vary greatly based on the brand/mixture of gluten free flour used. I'm really going to try to stop buying the frozen loaves at the store and start making my own loaf each week. Hopefully I can stick with it!!
Subscribe to:
Posts (Atom)