Thursday, December 29, 2011
Lazy
Ah, my husband works as a professor, so he has over a month of not having to go into the office. Therefore, he's more active around the house. He volunteered to take over cooking, and I wasn't about to argue! So, another hiatus from the blog, as I get frozen meals and other easy dishes served up each night. I've got it good. ;)
Friday, December 23, 2011
Pumpkin Cheesecake Bars
Crust:
20 creme-filled chocolate sandwich cookies
2 1/2 Tbs unsalted butter, melted
Filling:
2 8oz packages cream cheese, at room temperature
1 cup sugar
1 cup canned pumpkin puree
3 large eggs, at room temperature
1 tsp vanilla extract
3 Tbs all-purpose flour
1 tsp pumpkin pie spice
1/4 tsp salt
1) Preheat oven to 350F. Line an 8-inch-square pan with foil, so that foil overhangs sides. Mist with cooking spray.
2) Make crust: Process cookies in food processor until ground. Pulse in butter. Press evenly into pan. Bake until firm, 10 to 12 minutes. Cool slightly.
3) Make filling: With an electric mixer on medium speed, beat cream cheese and sugar until smooth, about 2 minutes. Beat in pumpkin, then eggs, 1 at a time. Beat in vanilla, flour, spice and salt until just combined.
4) Pour mixture into pan. Put pan on a large rimmed baking sheet; place in oven. Pour hot water into baking sheet until it's nearly filled. Bake until cheesecake is set around edges, but jiggles slightly in center, 40 to 45 minutes. Remove pan from sheet; cool completely on rack. Cover with plastic wrap. Chill until firm, at least 3 hours.
Review: This was the second time I had made these bars. The first time, the water from the outer pan spilled and ignited a fire. I'm happy to say fire was not part of the recipe this time!! I made these late at night, after an evening of decorating Christmas cookies with my husband's family. Last year I joked about making cake and most were in agreement that the standard holiday pies were not as exciting after eating them a month earlier for Thanksgiving. I planned and planned, but realized 2 wks ago that I did not have a way of transporting a cake. I shopped for a cake carrier, and found one, but shipping could not be guaranteed prior to Christmas day. I decided then to make these bars for the holiday, noting the pumpkin would be season appropriate, and ironically my cake carrier arrived today! Go figure. Luckily, these bars were a hit and the promise of cake was forgotten! My only complaint was that I used pumpkin that was not Libby's. After reading that Libby uses GMO pumpkin, I decided to try a different brand. Ideally, I like to avoid GMO foods. Yet, they specially breed their pumpkins to have less water. Therefore, the pumpkin I used was watery and the cheesecake didn't set very well in the middle. I'm not sure if cooking longer would alleviate that, or if I should press my pumpkin through cheesecloth before mixing it in. I'm still not thrilled about the idea of returning to use Libby's pumpkin. We'll see what happens . . .

Saturday, December 17, 2011
Quinoa Pilaf With Tomato, Spinach & Pine Nuts (crockpot recipe)
1 cup quinoa
2 Tbs olive oil
1 onion, chopped
4 plum tomatoes, seeded and diced
2 cups vegetable broth
salt and pepper
1/2 cup pine nuts
2 cups loosely packed baby spinach
1) Rinse quinoa thoroughly in cold water. Drain well.
2) In a large skillet, warm oil over medium-high heat. Add onion and cook, stirring often, until softened, 3 to 5 minutes. Stir in tomatoes and broth and increase heat to high. Bring to a boil, then carefully transfer to slow cooker. Stir in quinoa and season with salt and pepper. Cover and cook on low until most of the liquid is absorbed and quinoa is tender, about 2 hours.
3) Place pine nuts in a small skillet over medium-low heat. Cook, shaking skillet constantly, until pine nuts are light golden and fragrant, about 3 minutes. Immediately transfer to a bowl.
4) Remove slow cooker cover and stir in spinach and pine nuts. (If pilaf looks dry, add up to 1/2 cup more broth.) Cover and cook 15 minutes longer, or until the spinach has wilted completely. Season with salt and pepper to taste.
Review: I had not realized this was a crockpot recipe, which eliminated the possibility of making this after work. I really prefer these dishes on the weekends, as it allows me to do other things while the meal cooks. However, this one involved more work than is typical. Wilting spinach is one of the easiest things to do, in a skillet. It's soooooo difficult in a crockpot!! It took some doing and I almost gave up. But, it eventually came together. This dish didn't have a strong flavor, so I added quite a bit of salt. It was hearty, but would have benefited from some garlic, and maybe some oregano.

Adapted from:
http://www.myrecipes.com/recipe/red-quinoa-pilaf-tomato-spinach-50400000116325/
Friday, December 16, 2011
Charro Beans With Chipotle Sausage
2 Tbs olive oil
1 small onion, chopped
1 small green bell pepper, chopped
2 Mexican chipotle-flavored grain meat sausages (such as Field Roast), cut into 1-inch rounds
2 cloves garlic, minced
1/2 tsp chili powder
1 15oz can diced tomatoes
3 15oz cans pinto beans, rinsed and drained
1/2 cup vegetable broth
1) Heat oil in large saucepan over medium heat. Add onion, bell pepper and sausage, and saute 3 to 5 minutes, or until vegetables are soft and translucent. Add garlic and chili powder, and cook 1 minute more.
2) Stir in tomatoes, beans and broth; season with salt and pepper, if desired. Cover and bring to a boil. Reduce heat to medium-low, and simmer, covered, for 10 minutes.
Review: This recipe originally called for dried beans, soaked over night and cooked for 1 1/2 hours. Puh-lease! I don't have that kind of time on a weeknight!! So, I used canned beans and this was done in about 20 minutes, including prep work. This dish is what would happen if beans-n-franks got married to chili, in Mexico. It was really interesting, but very tasty. We ate all of it, with no leftovers!

Adapted from:
http://www.vegetariantimes.com/recipe/charro-beans-with-chipotle-sausage/
Thursday, December 15, 2011
Pappardelle With Swiss Chard, Onions & Goat Cheese
12oz pappardelle or fettuccine
2 Tbs olive oil
1 small red onion, thinly sliced
4 cloves garlic, sliced
2 bunches Swiss chard, stems discarded and leaves cut into 1-inch strips
Kosher salt and black pepper
4 oz fresh goat cheese, crumbled
1) Cook the pasta according to the package directions. Reserve 1 cup of the cooking water; drain the pasta and return it to the pot.
2) Meanwhile, heat the oil in a large skillet over medium-high heat. Add the onion and garlic, and cook, stirring occasionally, until the onion is soft, 3 to 5 minutes. Add the chard and 1/4 tsp each of salt and pepper, and cook, tossing frequently, until tender, 3 to 5 minutes more.
3) Add the chard mixture, 3 oz of the goat cheese, 3/4 cup of the reserved cooking water, and 1/2 tsp salt to the pasta and toss until the goat cheese melts and coats the pasta (add more cooking water if the pasta seems dry). Serve sprinkled with the remaining ounce of goat cheese.
Review: I used 2 bunches of rainbow chard, so it was really colorful and pretty. Mike decided to try more whole grain pasta, believing it to be a healthier pasta. However, I'm not a big fan of the whole grain texture, nor flavor. It's a little sweeter than I'm used to, and I don't like excessive chewing. Between the whole grains and the greens, this was a lot of chewing. I grew tired of the dish before I grew full. This was also a little bland. I'd definitely suggest using as small an amount of pasta water as possible, to preserve the goat cheese flavor. And don't skimp on the salt!

Adapted from:
http://www.realsimple.com/food-recipes/browse-all-recipes/pappardelle-with-swiss-chard
Monday, December 12, 2011
Sweet Potato & Black Bean Enchiladas
Sauce
1 15oz can tomato sauce
1 3/4 cup vegetable broth
1 tsp ancho chile powder
1 tsp chili powder
1 tsp garlic powder
1 tsp onion powder
1 tsp dried oregano
1/2 tsp chipotle chile powder
Filling
1 Tbs extra virgin olive oil
1 small onion, diced
1 1/2 lb sweet potatoes, peeled and diced
1 15oz can diced tomatoes, drained
1 16oz jar prepared medium salsa
2 cloves garlic, minced
1 chipotle chile in adobo sauce, drained and minced
1 15oz can black beans, rinsed and drained
1 12oz round queso fresco, divided
Enchiladas
extra virgin olive oil, for brushing baking dish
16 6-inch corn tortillas, warmed
1 avocado, sliced, for garnish
1/2 cup sour cream, for garnish
1) To make Sauce: Bring all ingredients to a simmer in saucepan over medium heat. Whisk to combine, then remove from heat. Season with salt and pepper, if desired.
2) To make Filling: Heat oil in separate saucepan over medium heat. Add onion, and saute 3 to 5 minutes, or until soft. Add sweet potatoes, tomatoes, salsa, garlic, chipotle chile and 1/2 cup water; bring to a boil. Reduce heat to medium-low, and simmer 30 to 40 minutes, or until sweet potatoes are soft. Mash mixture with potato masher until combined. Add black beans, and cook 5 minutes. Stir in half of queso fresco, and remove from heat.
3) To assemble Enchiladas: Preheat oven to 350F. Brush 13x9-inch baking dish with oil. Spread 1/2 cup Sauce in bottom of dish. FIll tortillas with Filling. Roll, and pack close together seam-side down in baking dish. Top with remaining Sauce and queso fresco. Bake 15 minutes.
4) Adjust oven to broil. Broil Enchiladas 5 minutes, or until cheese is browned and bubbly. Let rest 10 minutes before serving. Garnish with avocados and sour cream.
Review: Wow, this recipe is quite the endeavor! I decided not to make the sauce from scratch, as I lacked the vast majority of the ingredients. If I had to buy everything, it'd be a $50 enchilada recipe! So, I bought canned red enchilada sauce, but will make it from scratch someday. I also couldn't find queso fresco, and just used a bag of 4 cheese Mexican blend shredded cheese. The filling made so much, I easily could have made 2 pans of enchiladas. Instead, I tried to cram as many as I could into my lasagna pan. It ended up being a crammed mess, that was very choppy and disintegrated when I scooped it out. Serving bowls looked like piles of pre-digested enchilada. But, it was incredibly yummy and definitely worth the mess! It was spicy, with a strong tomato flavor. It wasn't as sweet as other recipes I made using very similar ingredients! Mike complained it was a little spicy and accused me of using more than one chipotle pepper. I didn't, but I may have to use 1/2 pepper next time.


Adapted from:
http://www.vegetariantimes.com/recipe/sweet-potato-black-bean-enchiladas/
Sunday, December 11, 2011
Warm Spiced Lentil Bowl With Yogurt & Smoked Almonds
2 1/2 tsp toasted sesame oil
2 1/2 tsp whole cumin seeds
1 medium carrot, chopped
1 rib celery, chopped
1 medium leek, trimmed and chopped
3 cups vegetable broth
1 cup brown lentils, rinsed and drained
3 cloves garlic, minced
1/3 cup smoked almonds, coarsely chopped
1/2 cup plain Greek yogurt
1) Heat oil in large saucepan over low heat. Add cumin seeds, and cook 1 minute, or until fragrant. Stir in carrot, celery and leek. Increase heat to medium-high, and saute 3 minutes. Stir in broth and lentils. Bring mixture to a simmer, reduce heat to low, and cook 20 minutes, or until lentils are tender. Stir in garlic, and cook 5 minutes more. Season with salt and pepper, if desired.
2) Ladle lentil mixture into 4 bowls, and garnish with almonds and yogurt.
Review: This mostly tasted like a normal lentil side dish. However, the smoked almonds gave it a very exotic flavor! I was surprised to see how much they cost, though. I think the almonds cost more than all of the other ingredients, combined!

Adapted from:
http://www.vegetariantimes.com/recipe/warm-spiced-lentil-bowl-with-yogurt-and-smoked-almonds/
Thursday, December 8, 2011
Cherry Tomato & Tapenade Tartlets
2 cups cherry tomatoes, halved
1/4 tsp herbes de Provence
1/2 17.3oz pkg puff pastry, thawed
6 tsp black olive tapenade
9 tsp prepared hummus
1) Preheat oven to 425F. Line baking sheet with parchment paper, or spray with cooking spray.
2) Cut puff pastry into six 3 1/2-inch squares, and transfer squares to prepared baking sheet. Prick squares with fork.
3) Spread each puff pastry square with 1 tsp tapenade, then 1 1/2 tsp hummus. Top each tartlet with 8 cherry tomato halves. Sprinkle with herbes de Provence. Bake tartlets 20 minutes, or until crusts are browned on bottom and edges. Serve warm or at room temperature.
Review: I had not realized this was a recipe for an appetizer. And, I regret not having seen this recipe when I had my hummus party! This was incredibly tasty, and we ate all of them for dinner. Unfortunately, the tartlets were incredibly greasy. Mike had one fly off his plate and onto the floor! I couldn't imagine actually serving this at a party, since they left our hands such an oily mess. They did make my belly happy, though.

Adapted from:
http://www.vegetariantimes.com/recipe/cherry-tomato-and-tapenade-tartlets/
Tuesday, December 6, 2011
Lasagna With Asparagus, Leeks & Mushrooms
2 Tbs butter, divided
2 medium leeks (white and light green parts), halved and thinly sliced
1 lb asparagus, trimmed and cut diagonally into 1-inch pieces
4 oz fresh morel or shiitake mushrooms, rinsed and coarsely chopped
2 tsp fresh thyme, chopped
3 1/2 cups vegetable broth
1 1/2 cups heavy whipping cream
1 bay leaf
2 Tbs all purpose flour
9oz pkg no-cook lasagna noodles
1 1/4 cups finely grated Parmesan cheese, divided
1) Melt 1 Tbs butter in large heavy skillet over medium high heat. Add leeks; cook until wilted, stirring often, about 4 minutes. Transfer to medium bowl. Melt remaining Tbs of butter in same skillet. Add asparagus, mushrooms and thyme. Sprinkle with salt and pepper; saute until asparagus is crisp-tender, stirring often, about 4 minutes. Add to bowl with leeks and toss to distribute evenly. Add broth, cream and bay leaf to same skillet and boil over high heat until slightly thickened, about 6 minutes. Sprinkle flour over and whisk to blend. Boil until sauce thickens, about 1 minute, whisking until smooth. Remove from heat and discard bay leaf. Season to taste with salt and pepper.
2) Preheat oven to 350F. Coat four 2-cup shallow oval or round baking dishes with nonstick cooking spray. Break off corners of noodles to fit flatly into dishes. Spoon 1/4 cup sauce into each dish. Place 1 noodle atop sauce. Scatter 1/4 cup vegetable mixture over, spreading in even layer. Drizzle 2 Tbs sauce over. Sprinkle rounded tablespoonful cheese over each. Repeat layering 2 more times with noodles, vegetables, sauce and cheese. Drizzle remaining sauce over lasagnas.
3) Cover each dish tightly with foil. Place on rimmed baking sheet and bake until noodles are tender, about 40 minutes. Uncover and bake until sauce is bubbling and cheese begins to brown, about 6 minutes. Let stand at room temperature 5 minutes before serving.
Review: Argh! My sauce never became much of a sauce. It remained runny and the flour clumped. I've never had such an issue in making sauce like this. I think much of the problem was that I made the sauce in the same skillet and the cooking space may have been too broad. Next time I will definitely make it in a saucepan. But, this was still yummy. I used shiitake mushrooms, as morels are incredibly expensive. I had no idea! And I made this one big lasagna, instead of the two individual servings described in the recipe. This meant I also had to "fluff" it out, so I added shredded mozzarella in a layer with the leeks, while the other layer was asparagus, mushrooms and Parmesan. It worked well!

Adapted from:
http://www.epicurious.com/recipes/food/views/Lasagna-with-Asparagus-Leeks-and-Morels-358231
Monday, December 5, 2011
Vegetables Wellington Redux
1 Tbs olive oil
1 lb asparagus, cut into 1 1/2-inch pieces
2 medium bell peppers (any color), cut into thin strips
1 medium onion, thinly sliced
1 5oz pkg baby spinach leaves
1 4oz jar prepared pesto sauce
1 large egg
1 17.3oz pkg frozen puff pastry, thawed
1 10oz log goat cheese, softened
1 16oz jar prepared tomato sauce, warmed
1) Heat oil in skillet over medium-high heat. Add asparagus, bell peppers and onion, sauteing for 5 to 10 minutes, or until vegetables begin to soften. Add spinach, and cook 3 to 4 minutes, or until spinach wilts. Stir in pesto. Cool.
2) Whisk egg in bowl, and set aside. Cut 15x10-inch piece of parchment paper, and set on work surface. Place 1 sheet puff pastry on parchment paper. Lift parchment paper with puff pastry, and place parchment-side-down in 9-inch loaf pan. Press pastry into pan, being careful not to let folds get caught in parchment, and allow pastry to hang over sides. Cut squares from second puff pastry sheet, and press onto short sides of parchment-covered pan to make dough shell. Prick bottom of puff pastry all over with fork.
3) Spread goat cheese over bottom of puff pastry. Top with asparagus mixture. Fold excess puff pastry over vegetables, and brush edges with egg.
4) Cut 9 1/2 x 5 1/2-inch piece of puff pastry from remaining sheet. Set on top of asparagus mixture, pressing to seal edges. Refrigerate 30 minutes, along with unused pastry scraps and egg.
5) Preheat oven to 425F, and place oven rack on second-lowest level. Brush top of Wellington with egg, and poke 2 or 3 holes in top. Cut decorative leaves and stems from remaining pastry, press onto top of Wellington, and brush with egg. Use tip of small knife to score leaves and top with decorative touches.
6) Bake Wellington 15 minutes. Reduce oven heat to 350F, and bake 45 minutes more. Cool 15 minutes.
7) Use parchment paper to lift Wellington from loaf pan. Remove parchment paper, and transfer Wellington to flat serving plate. Slice, and serve with warmed tomato sauce.
Review: This was incredibly delicious, though I did not serve it with tomato sauce. The reason being, that I had other chaos to deal with and totally spaced the sauce. I had perfectly timed making this and making pumpkin cheesecake bars. My plan was to slide the bars into the oven right after the Wellington. It all was working so well, until it didn't. Apparently the Wellington created a lot of grease. The parchment paper created a bit of a funnel, allowing the grease to bubble up, and out over the edge of the cookie sheet I had under the loaf pan. It missed the cookie sheet completely and formed a huge puddle of grease in the bottom of my oven (which I didn't see). When I slid the bars in, I had the bars in a 8x8 pan, nestled into a 9x13 pan filled with water. A bit of the water spilled out and hit the grease puddle. I had massively huge flames ensue, which ignited the parchment paper that was used in the cheesecake bars. I was SO scared, as flames seemed to be engulfing everything. I shut the oven door in a panic, and the flames started to die down. But, I panicked that I should get the pans out of the oven. When I opened the oven doors, the flames quickly picked up and took over again. I shut the door and let it die down completely. At this point, my kitchen was filled with smoke. I ran around fanning the smoke out of open windows and doors. It was awful. And, I was home alone. My husband arrived shortly after the flames quit. I was shaking and scared, so of course, warmed tomato sauce was not on my mind!! The Wellington was absolutely amazing, savory and crispy. The cheescake bars were tossed in the trash. The oven was salvaged with cornstarch and a wipe-down. What a night!


Adapted from:
http://www.vegetariantimes.com/recipe/vegetables-wellington-redux/
Thursday, November 24, 2011
Chocolate Pecan Tart
1 3/4 cups pecan halves
1 1/4 cups all-purpose flour, spooned and leveled
1/4 cup unsweetened cocoa powder
1/2 tsp kosher salt, plus a pinch for the filling
1/2 cup (1 stick) unsalted butter, at room temperature
1/4 cup sugar
2 large egg yolks
1/2 lb semisweet chocolate, chopped
3/4 cup heavy cream
1) Heat oven to 350F. Spread the pecans on a rimmed baking sheet and toast, tossing once, until fragrant, 6 to 8 minutes. Let cool, then roughly chop. In a medium bowl, whisk together the flour, cocoa powder and salt.
2) Using an electric mixer, beat the butter and sugar on medium-high until creamy, 2 to 3 minutes. Beat in the egg yolks. Reduce mixer speed to low and gradually add the flour mixture; mix until combined but still crumbly.
3) Press the dough into the bottom and up the sides of a 4x14 inch rectangular (or 9 inch round) tart pan. Line with a large piece of parchment paper, leaving an overhang on all sides, and fill with dried beans or pie weights. Place the pan on a rimmed baking sheet and bake until the edges of the crust are dry, 20 to 22 minutes. Remove the parchment and weights, and bake until dry and set, 10 to 12 minutes. Let cool completely.
4) Meanwhile, in a large bowl, combine the chocolate and pinch of salt. In a small saucepan, bring the cream to a bare simmer; pour over the chocolate and let stand 1 minute. Stir gently until the mixture is smooth. Stir in 1 1/2 cups of the pecans. Pour the mixture into the cooled tart shell and sprinkle with the remaining pecans. Refrigerate until set, at least 1 hour.
Review: This is delicious!! I feared this would be just a crumbly candy bar. However, the filling was actually pretty creamy - almost like fudge. The crust was really crumbly and made a mess, but it was totally worth it.


Adapted from:
http://www.realsimple.com/food-recipes/browse-all-recipes/chocolate-pecan-tart
Sunday, November 20, 2011
Chili With Sweet Potatoes (crockpot recipe)
1 medium red onion, chopped
1 green bell pepper, chopped
4 garlic cloves, chopped
1 Tbs chili powder
1 Tbs ground cumin
2 tsp unsweetened cocoa powder
1/4 tsp ground cinnamon
Kosher salt and black pepper
1 28oz can fire-roasted diced tomatoes
1 15.5oz can black beans, rinsed
1 15.5oz can kidney beans, rinsed
1 medium sweet potato, peeled and cut into 1/2-inch pieces
sour cream & scallions for garnish
1) In a 4-6 quart slow cooker, combine the onion, bell pepper, garlic, chili powder, cumin, cocoa, cinnamon, 1 tsp salt and 1/4 tsp black pepper. Add the tomatoes (and their liquid), beans, sweet potato and 1 cup water.
2) Cover and cook until the sweet potatoes are tender and the chili has thickened, on low for 7 to 8 hours, or on high for 4 to 5 hours.
3) Serve with sour cream and thinly sliced scallions.
Review: This was an amazing chili recipe! The cocoa and cinnamon added an exotic flavor, though it melded perfectly with the sweet potatoes. It wasn't exactly a "chili" taste, but that may be what made this so exceptional!

Adapted from:
http://www.realsimple.com/food-recipes/browse-all-recipes/slow-cooker-vegetarian-chili-with-sweet-potatoes
Saturday, November 19, 2011
Mushroom Potpie
4 Tbs olive oil
1 1/2 lbs mushrooms (cremini or button), quartered
4 carrots, cut into 1/2-inch pieces
3 celery stalks, sliced 1/4-inch thick
1/2 tsp dried thyme
Kosher salt and black pepper
1/3 cup all-purpose flour
1 1/2 cups vegetable broth
1 cup frozen peas
1 sheet puff pastry (half a 17.3oz package), thawed
1) Heat oven to 400F. Heat 2 Tbs of the oil in a large skillet over medium-high heat. Add the mushrooms, carrots, celery, thyme, 1/2 tsp salt and 1/4 tsp pepper. Cook, stirring occasionally, until the vegetables are tender, 12 to 15 minutes. Add the flour and cook, stirring, for 30 seconds. Add the broth and peas; bring to a boil.
2) Transfer the mushroom mixture to an 8-inch baking dish. Lay the pastry on top and cut several vents in it. Place the baking dish on a rimmed baking sheet and bake until the crust is golden, 25 to 30 minutes. Let rest 15 minutes before serving.
Review: I left out the celery, as I couldn't find the stalks sold individually and I didn't want a whole bag of celery! I imagine it would have added depth to this potpie, but it was pretty delicious even without it. The filling thickened nicely and just tasted hearty. A perfect dish for a chilly night!

Adapted from:
http://www.realsimple.com/food-recipes/browse-all-recipes/mushroom-potpie
Thursday, November 17, 2011
Gnocchi With Fava Beans
2 Tbs olive oil
1 Tbs minced garlic
1 19oz can fava beans, rinsed and drained
1 cup prepared roasted red peppers, drained and cut into strips
1 13.75oz can water-packed artichoke hearts, rinsed, drained and halved
1 8oz can tomato sauce
1 lb pkg vacuum-packed gnocchi
1) Heat oil in large skillet over medium heat. Saute garlic 30 seconds, or until fragrant. Add fava beans, red peppers and artichoke hearts, and cook 5 minutes. Stir in tomato sauce and cook 2 minutes more, or until heated through.
2) Meanwhile, prepare gnocchi according to package directions. Drain. Transfer gnocchi to large serving bowl, and spoon fava bean mixture over top. Serve hot.
Review: I've seen so many recipes for fava beans, but could NEVER find them in Idaho. So, last week I saw them in the produce section of Whole Foods (vacuum packed package of fresh beans). I bought them, and then couldn't find any of those recipes! I did an online search and found this recipe. My husband then made it for me tonight. He did a great job and the flavor combination was superb! I found I love fava beans and need to look for the rest of those recipes!

Adapted from:
http://www.vegetariantimes.com/recipe/gnocchi-with-fava-beans/
Wednesday, November 16, 2011
Mediterranean Campanelle With Roasted Red Peppers & Almonds
12 oz campanelle, penne or some other short pasta
4 red or orange bell peppers, cut into quarters and seeds removed
3/4 cup pitted kalamata olives, quartered
1/2 cup coarsely chopped roasted almonds
1/4 cup olive oil
1 Tbs fresh thyme leaves
Kosher salt and black pepper
1) Cook the pasta according to the package directions. Reserve 1/4 cup of the cooking water; drain the pasta and return it to the pot.
2) Meanwhile, heat broiler. Place the peppers on a baking sheet skin-side up and broil until blackened, 8 to 10 minutes. When the peppers are cool enough to handle, scrape away the blackened skins with a knife and discard. Cut the flesh into 1-inch pieces.
3) Add the peppers, olives, almonds, oil, thyme, 2 Tbs of the reserved cooking water, 1/2 tsp salt and 1/4 tsp black pepper to the pasta and toss to combine (add more cooking water if the pasta seems dry).
Review: I bought a bag of six bell peppers at Costco (2 yellow, 2 orange, 2 red). They're smaller peppers than the grocery store, but 6 are still cheaper than 4 at the grocery store! I roasted them all. The flavor was absolutely amazing, especially combined with the olives and toasted almonds. Yum! And, I've roasted peppers on my own before and it was an absolute mess. For some reason, it was way easier this time. Maybe I'll be making my own more often and stop buying the jarred stuff!

Adapted from:
http://www.realsimple.com/food-recipes/browse-all-recipes/mediterranean-campanelle-roasted-red-peppers
Monday, November 14, 2011
Spaghetti With Garlicky Kale & Tomatoes
1 pkg spaghetti
2 Tbs olive oil
2 cloves garlic, chopped
Kosher salt and black pepper
1 bunch kale, thick stems removed and leaves torn into bite-sized pieces
2 pints grape tomatoes, halved
1/3 cup chopped roasted tomatoes
1/4 cup grated pecorino, plus more for serving
1) Cook the pasta according to the package directions. Reserve 1/4 cup of the cooking water, drain the pasta, and return it to the pot.
2) Meanwhile, heat the oil in a large skillet over medium-high heat. Add the garlic, 1/4 tsp salt and 1/8 tsp pepper. Cook, stirring occasionally, until beginning to brown, 4 to 5 minutes. Add the kale and cook, tossing frequently, until tender, 2 to 3 minutes. Add the tomatoes and cook, tossing frequently, until the tomatoes begin to soften, 1 to 2 minutes more.
3) Add the kale mixture, almonds, pecorino and reserved cooking water to the pasta, and toss to combine. Serve with additional pecorino.
Review: I was expecting to use more than 2 cloves of garlic, due to the name of the dish. However, garlic has a stronger taste than kale, so the flavor did stand out. This was a great, hearty dish that was filling. It was also super quick and easy to make. The flavor blended well and was so tasty, it didn't require cheese!

Adapted from:
http://www.realsimple.com/food-recipes/browse-all-recipes/whole-grain-spaghetti-with-garlicky-kale-and-tomatoes
Saturday, November 12, 2011
Pasta With Hummus, Tomatoes & Olives
1 pkg penne
2 cups cherry tomatoes, halved
1 cup kalamata olives, halved
3/4 cup plain hummus
1/2 tsp smoked paprika
1) Cook pasta according to package directions. Drain and place in mixing bowl.
2) Add all other ingredients and stir until mixed well. Serve warm.
Review: Tonight I hosted a party, courtesy of houseparty. It was designed to showcase Sabra Hummus. I got coupons for free hummus, an apron, a trivet and a spatula. I also got party favors, which were very nice keychains, coupons and recipe cards! The party was a hit. Everyone thinks of hummus as just a dip, but I got to showcase it as a more versatile ingredient. This was an easy pasta dish and it made a tremendous amount of food!

Sabra Hummus Deviled Eggs
6 eggs
1/3 cup + 1 Tbs Sabra hummus
2 Tbs olive oil
1/4 tsp freshly ground black pepper
1/4 tsp salt
3 tsp relish
paprika for garnish
1) Place eggs in pot and cover with cold water. Bring to a boil over high heat. Turn off the heat and let sit for 14 minutes. Remove with a slotted spoon and run cold water over the eggs. Cool eggs 10 minutes.
2) Remove shells when cool. Cut in half and scoop out the yolk and reserve in bowl of a food processor. Repeat with the remaining eggs.
3) Add hummus, olive oil, pepper and salt to the yolks and puree in the food processor. Add the relish and pulse 3-5 times to incorporate.
4) Put the yolk mixture in a piping bag. (Use a tall glass and fold the edges of the piping bag over the glass to make it easier to transfer the mixture.) Pipe about a teaspoon of the mixture into each of the egg white halves and sprinkle with paprika.
Review: I was chosen to host a Sabra sponsored party (see above post). I was supposed to have the party last week, but there was a family event conflict and we had power outage issues. I had everything lined up today, when once again, we lost power. My wonderful home in the woods of New England is proving to be a dangerous spot to be in, electricity-wise. Thankfully, my mother-in-law allowed us to host the party at her house, despite having international guests! It turned out to be a neat reception to their arrival, thankfully.
However, in all of today's chaos, I had little attention for details. Therefore, I thought the hummus completely replaced the egg filling. I tossed all the yolks into a bowl for my husband to make sandwich fixings (he mixes it with mayo, and tuna or salmon). Yet, simply having hummus and relish as the filling was a hit at the party! Everyone ate them and they were quickly gone. I wonder how they'd taste with the egg yolks mixed in? And, I topped these with smoked paprika, as it's just tastier than regular paprika.


Adapted from:
http://sabra.com/recipes/Hummus-Deviled-Eggs
Thursday, November 10, 2011
Squash Mac-n-Cheese With Amaretti Crust
1 lb of pumpkin or other fall squash, peeled, seeded & cut into 1 inch cubes
1 Tbs olive oil
salt and pepper
1 pkg elbow-shaped pasta
4 Tbs butter
2 Tbs sage, thinly sliced
4 Tbs flour
2 cups milk
1 tsp dijon mustard
2 cups white cheese, shredded (I used Swiss, Gruyere & Parmesan)
1/2 cup amaretti cookies, crumbled
1) Toss the pumpkin/squash with olive oil and season with salt and pepper.
2) Roast the pumpkin/squash in a preheated (350F) oven until tender, 30 to 40 minutes.
3) Cook the pasta as directed.
4) Melt the butter in a saucepan over medium heat and add sage. Cook until the butter is bubbling and has turned golden brown.
5) Mix in the flour and let simmer until it returns to a light golden brown.
6) Add the milk, mustard and cheese, and simmer until it thickens and the cheese has melted.
7) Mix the pumpkin, pasta and cheese sauce. Pour into a baking dish, topping it with the amaretti cookie crumbles.
8) Bake in a preheated oven (350F) until golden brown on the top and bubbling on the sides, about 30 to 40 minutes.
Review: We skipped the cookie topping, as the only place we could find amaretti cookies was Whole Foods and they were $10. But, the dish was fine without them! This was such a yummy combination of fall squash (pictured below), cheese and pasta. Of course, we had quite the carb slump afterwards, but our bellies were soooooo happy!


Adapted from:
http://www.closetcooking.com/2011/10/pumpkin-mac-n-cheese.html
Tuesday, November 8, 2011
Roasted Brussels Sprouts Medley With Nori Strips
2 1/2 cup Brussels sprouts, trimmed and halved
1 medium sweet potato, cubed
1 parsnip, sliced
1 turnip, cubed
1 1/2 cups whole baby carrots
10 cloves garlic, peeled and lightly crushed
2 Tbs olive oil
2 sheets toasted nori
1/3 cup chopped, toasted hazelnuts
1 Tbs toasted walnut oil
1) Preheat oven to 400F. Coat baking sheet with cooking spray.
2) Toss together Brussels sprouts, sweet potato, parsnips, turnip, carrots, garlic and olive oil in large bowl, making sure vegetables are coated with oil. Transfer vegetables to prepared baking sheet, and roast 35 to 45 minutes, or until vegetables are tender and browned, stirring halfway through.
3) Meanwhile, cut or tear each nori sheet into 4 rectangles (you should have 8 pieces). Stack pieces on top of one another, and slice into thin strips.
4) Transfer vegetables to large serving bowl, and toss with hazelnuts, walnut oil and nori strips. Season with salt and pepper, if desired.
Review: I bought a bag of prediced parsnips and turnips at Trader Joes. It said it was good until 11/11/2011, but my bag grew moldy inside and I had to toss them out. Even with that tossed, this dish made a lot of food! I also took a savings move by not buying a package of nori strips (about $6) and instead bought a package of seaweed snacks ($1). Trader Joes' seaweed snacks are just little sheets of toasted nori. It was the perfect amount, and I crumbled them over the top of the veggies. This was soooo good, though my Brussels sprouts were a little over cooked. Next time, I'll probably saute them and roast everything else. Yum!!!

Adapted from:
http://www.vegetariantimes.com/recipe/roasted-brussels-sprouts-medley-with-nori-strips/
Monday, November 7, 2011
Chickpeas With Chard & Pan-Roasted Tomatoes
1 cup brown rice
2 Tbs olive oil
4 small plum tomatoes, halved lengthwise
1 small bunch Swiss chard, thick stems and ribs removed and leaves torn
2 cloves garlic, thinly sliced
salt and black pepper
1 15oz can chickpeas, rinsed and drained
1) Cook the rice according to package directions.
2) Twenty minutes before the rice is done, heat the oil in a large skillet over medium-high heat. Add the tomatoes, cut-side down, and cook, shaking the pan occasionally, until browned and starting to soften, 3 to 5 minutes; turn and cook for 1 minute more. Transfer to a plate.
3) Reduce heat to medium and add the chard, garlic, 2 Tbs water, 1/2 tsp salt and 1/4 tsp pepper to the skillet. Cook, tossing, until the chard wilts, 2 to 3 minutes.
4) Return the tomatoes to the skillet, add the chickpeas, and toss until heated through, 1 to 2 minutes. Serve over the rice.
Review: I used instant brown rice, and cooked everything at the same time. It took quite a bit to manage 3 burners of cooking at the same time, but it all finished together and saved a lot of cooking time. This had a great savory flavor, but the tomatoes become a little mushy in this process. I also think this would be better served over couscous (especially Israeli couscous).

Adapted from:
http://www.realsimple.com/food-recipes/browse-all-recipes/chickpeas-with-chard-and-pan-roasted-tomatoes
Sunday, November 6, 2011
Shrimp Scampi
For years I've wondered why there are no fake fish products. I'd seen beef, turkey, chicken and pork products replicated with vegetable products. However, no fish, not once. Until tonight! We went to a new Whole Foods and found Yves Veggie makes two fish flavors! Shrimp Scampi and a Tuna Steak. So, I scooped up the scampi and tried it out tonight.


I've never had shrimp scampi before, as I became a vegetarian at a fairly young age, and shrimp scampi was a little too fancy for the SEMO I grew up in. But, my husband said this tastes pretty spot on. It definitely smelled fishy, so they must have made it right! Now, I need to convince my kitty it's not real, so she'll leave my bowl alone . . .


I've never had shrimp scampi before, as I became a vegetarian at a fairly young age, and shrimp scampi was a little too fancy for the SEMO I grew up in. But, my husband said this tastes pretty spot on. It definitely smelled fishy, so they must have made it right! Now, I need to convince my kitty it's not real, so she'll leave my bowl alone . . .
Sunday, October 23, 2011
Fusilli Bucati Lunghi With Roasted Red Pepper Sauce
2 Tbs garlic flavored olive oil
1 cup jarred roasted red bell pepper, rinsed, drained & chopped
1/2 medium onion, finely chopped
1 large carrot, finely diced
8oz dry fusilli bucati lunghi
1) Heat oil in saucepan over medium-high heat. Add roasted peppers, onion and carrot; saute 5 minutes, or until onion begins to brown. Add 3/4 cup water, cover and reduce heat to medium-low. Simmer 20 minutes.
2) Meanwhile, cook pasta in pot of boiling salted water according to package directions.
3) Remove roasted pepper mixture from heat, and puree in blender until smooth. Season with salt and pepper, if desired.
4) Drain pasta, and return to pot. Stir in red pepper sauce.
Review: First of all, Dreamfields does not make this fancy pasta, so I substituted spaghetti. This was pretty easy to make, and I get to boast about "homemade sauce." However, I wasn't expecting the bright orange color that was my end result. Maybe it'd be more red if I bought darker red roasted red bell peppers? I bought the store brand and some were kind of pale. Regardless, it was really tasty. We topped it with a little bit of grated Parmesan cheese for a little extra tasty.

Adapted from:
http://www.vegetariantimes.com/recipe/fusilli-bucati-lunghi-with-roasted-red-pepper-sauce/
Saturday, October 22, 2011
Nori, Egg & Potato Rolls
2 medium white potatoes, cut into 3-inch matchsticks
4 large eggs
3/4 tsp sweet paprika
2 tsp olive oil
1/4 cup finely chopped red onion
3 Tbs finely chopped celery
3 Tbs finely chopped green bell pepper
2 Tbs mayonnaise
1 tsp Dijon mustard
8 large sheets nori
1) Soak potatoes in cold water 15 minutes. Boil eggs 9 minutes; rinse and peel. Chop eggs, and transfer to bowl.
2) Drain potatoes, and toss with 1/2 tsp paprika. Heat oil in skillet over medium heat. Stir-fry potatoes 10 minutes, or until browned. Stir potatoes, onion, celery, bell pepper, mayonnaise, mustard and remaining 1/4 tsp paprika into eggs. Season with salt and pepper, if desired.
3) Place 1 sheet nori on work surface. Spoon 1/2 cup potato mixture in center of nori sheet (A). Fold all 4 corners up (B), tuck in edges (C) and invert (D) to create a round package. Repeat with remaining filling and nori. Chill 20 minutes, or until ready to serve.
Review: This should have been called potato salad seaweed packages! It was yummy, but then again, it combines two very yummy foods. I had accidentally used all the bell pepper in a previous recipe. Mike happened to have some baby sweet peppers on hand (for snacking) and I used a few of those. I think they added a special bit of flavor that was better than regular bell pepper. Yum!!
A)

B)

C)

D)

Adapted from:
http://www.vegetariantimes.com/recipe/nori-egg-and-potato-rolls/
Thursday, October 20, 2011
Gingersnap Latte Syrup
1/4 cup blackstrap molasses
1/4 cup sugar
1 tsp ground ginger
1/2 tsp ground cinnamon
1 dash ground cloves
1/4 tsp vanilla extract
1) Combine molasses, sugar, ginger, cinnamon and cloves, with 1 cup water in a medium saucepan. Bring to a boil. Reduce heat to medium, and boil 15 minutes.
2) Remove from heat, and stir in vanilla extract. Strain through a fine-meshed strainer into a jar or bowl. Cool.
3) To make a gingersnap latte, spoon 1 to 2 Tbs of this syrup into a mug, add 6oz coffee or 2 shots of espresso, and top with 1/4 cup frothed milk.
Review: I absolutely love flavored lattes. However, I haven't yet frothed milk in my home (though I do own a hand blender!). I thought this would be a great addition to my morning coffee, even without the froth. I started making it and was surprised to find there was no ginger in my spice cabinet! I'm not sure how that happened, as it's a staple ingredient in my home. I panicked and considered my options. I found my ginger people coffee flavored ginger chews and tossed in 3 of the candies (I doubled the recipe). I figured it had all the right ingredients, as it had ginger & sugar, and the coffee flavor wouldn't bother anything since I'm pouring this syrup into my coffee! I think it was a genius move. The syrup smells wonderfully of gingersnaps and made for a delicious treat first thing in the morning!
Adapted from:
http://www.vegetariantimes.com/recipe/gingersnap-latte-syrup/
Wednesday, October 19, 2011
Yummy Marinade
I made Roasted Vegetables With Quick Harissa Marinade tonight. I had difficulty finding the sauce I wanted. As we were searching the shelves, my husband stumbled upon this. I'm a big fan of the ginger people and have bought their candies. However, I'd never seen their sauces in the store. I quickly bought this, as it had the garlic and chile flavor I needed, but the addition of ginger sounded amazing. It was better than I expected, though the "kick" was more than I expected. Yum, this is a new favorite and made dinner come together so quickly!!

Tuesday, October 18, 2011
Quinoa Salad With Baked Tofu
1 cup quinoa
3 celery stalks, diced
1 red bell pepper, diced
1 pkg baked tofu (any flavor), diced
1/4 cup slivered blanched almonds, toasted
1 to 2 Tbs balsamic vinegar
1 Tbs Dijon Mustard
2 Tbs nutritional yeast
1) Rinse quinoa with cold water in a fine mesh strainer, until water runs clear. In medium saucepan, combine quinoa and 2 cups water, and bring to a boil over high heat. Reduce heat to low, cover and simmer 15 minutes. Remove from heat and let stand, covered, 15 minutes.
2) Meanwhile, whisk together balsamic vinegar, dijon mustard and nutritional yeast, forming a thick paste. Once the quinoa has cooled, mix the paste mixture into the quinoa.
3) Add all other ingredients and toss thoroughly.
Review: This originally was a very complicated recipe that involved marinating tofu and baking it. That has never worked well for me, and there are many companies that make very good tofu that's already flavored and baked. So, I tweaked the recipe to make it easier and it turned out well. However, it's so different from the recipe I used, that I think I can now claim this as an original recipe!! Which is good, because this vegan, but cheesy tasting dish will likely be a new favorite in our house.

Adapted from:
http://www.vegetariantimes.com/recipe/quinoa-salad-with-baked-marinated-tofu/
Monday, October 17, 2011
Creamy Fettuccine With Peas & Flowers
1 lb fettuccine
2 cups fresh peas, or thawed frozen peas
6 Tbs creme fraiche
6 Tbs grated Parmesan cheese
6 cloves garlic, minced
1 cup chopped edible flowers, plus 8 flowers for decoration
- chive blossoms, sweet peas, nasturtiums, marigold petals, calendula petals,
sunflower petals or squash petals
1/2 cup chopped fresh chives
1) Cook pasta according to package directions in boiling salted water, adding peas 3 minutes before end of cooking time. Drain, and reserve 1/4 cup cooking liquid.
2) Meanwhile, whisk together creme fraiche, cheese and garlic in large bowl. Season with salt and pepper, if desired, then fold in chopped flowers and chives.
3) Whisk reserved 1/4 cup pasta cooking water into creme fraiche mixture. Add pasta, and toss to coat. Divide pasta among plates, and garnish each serving with a whole edible flower.
Review: I'd been dying to make this recipe, as I had an abundance of marigolds on my deck. However, when I went out to pick them tonight, only 6 were in good condition. That wasn't nearly enough for the whole cup the recipe called for! Regardless, I brought them in, cut off the green bottoms (which contains the seeds), tossed the bottoms in the trash and chopped up the blossoms (including the centers). I ate a petal before adding it to the sauce. Funny enough, marigolds taste EXACTLY like they smell - kind of like a floral, bitter, citrus. It added a nice flavor to the sauce, but I can't imagine using as much as recommended, as it would have been too much of the flavor. Ultimately, this was tasty, easy and a little bit exotic.


Adapted from:
http://www.vegetariantimes.com/recipe/creamy-fettuccine-with-peas-and-flowers/
Saturday, October 15, 2011
Roasted Butternut Squash, Apple & Farro Chowder
1 1/2 lbs peeled butternut squash, diced
4 Tbs canola oil, divided
3 large Jonagold or Golden Delicious apples, peeled, cored and cut into large dice
1 cup sliced shallots
1/2 tsp ground cumin
1/2 tsp ground coriander
1/4 tsp red pepper flakes
2/3 cup semi-pearled farro
2 Tbs chopped fresh mint
1) Preheat oven to 450F. Line 2 large baking sheets with parchment paper. Toss squash with 2 Tbs oil in bowl, and season with salt, if desired. Toss apples with 1 Tbs oil in separate bowl, and season with salt, if desired. Arrange squash in a single layer on 1 prepared baking sheet, and apples in a single layer on other. Roast squash 32 to 36 minutes, or until tender and browned on bottom. Roast apples 22 to 24 minutes, or until browned.
2) Meanwhile, heat remaining 1 Tbs oil in Dutch oven over medium-low heat. Add shallots, and season with salt, if desired. Cover, and cook 10 minutes, or until shallots are shrunken, stirring occasionally. Add cumin, coriander, and red pepper flakes, and season with salt, if desired. Cook 30 seconds, or until fragrant. Add farro and 8 cups water, and bring to a boil. Reduce heat to medium-low, and cook 25 minutes, or until farro is tender. Stir in squash and apples, and remove from heat. Stir in mint and serve.
Review: For the record, I generally hate soup, stew and chowder. I need to chew in order to feel I'm having a meal, and soup leaves me feeling hungry as there's minimal chewing. This dish was actually really yummy though, and I was full after eating it! I couldn't find farro anywhere, despite going to two different Whole Foods!! Instead, I used pearled barley, 4 cups of water, and cooked the grain for 15 minutes. This had a wonderfully sweet flavor, but not in a dessert kind of way. The mint and red pepper flakes gave it a twisted flavor, but it all balanced wonderfully. And, since I buy my butternut squash prediced at Costco, this didn't take all that long to make. Yum!!
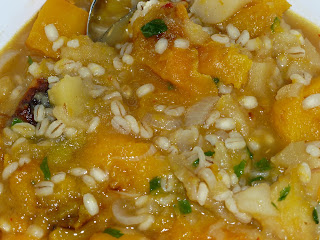

Adapted from:
http://www.vegetariantimes.com/recipe/roasted-butternut-squash-apple-and-farro-chowder/
Tuesday, October 11, 2011
Crispy Gnocchi With Brussels Sprouts & Mushrooms
2 Tbs butter
1 16oz pkg frozen gnocchi
2 tsp olive oil, divided
1 lb cremini mushrooms, quartered
8oz Brussels sprouts, thinly sliced crosswise
1 clove garlic, minced
1/4 cup shaved Parmesan, for garnish
1) Heat butter in nonstick skillet over medium-high heat. Add gnocchi, and cook 4 to 5 minutes, turning often, until browned. Transfer to large bowl.
2) Pour 1 tsp oil into pan, and add mushrooms. Cook 7 minutes, or until mushroom liquid has evaporated. Season with salt and pepper, if desired, and transfer to same bowl as gnocchi.
3) Pour remaining oil into pan, and add Brussels sprouts. Saute 5 to 7 minutes, or until sprouts are crisp-tender. Add garlic, and cook 1 minute more. Return mushrooms and gnocchi to pan, and saute 2 minutes, or until warmed through. Serve garnished with Parmesan, if desired.
Review: My husband has told me for years that he likes Brussels sprouts. However, I had never tried them and wasn't feeling adventurous. I received several this weekend, as my sister-in-law bought a stem with the Brussels sprouts still attached. She gave it to my mother-in-law, who in turn gave me several since there were so many. I then proceeded to find a recipe to use them in, and discovered I also love these little green guys. It's hard to describe the flavor, but I think it's a combination of spinach and cabbage. So yummy!
Now, for a review of the recipe . . . I tweaked this a little bit as I didn't want portions to get cold, or to dirty 3 pans. I cooked the mushrooms and gnocchi together, with twice as much butter. It worked perfectly. I left the Brussels sprouts by themselves, as they can easily overcook. It all came together in the same time frame and tossed together quite easily. It's a great combination of flavors. I had doubled the mushrooms and will double the Brussels sprouts next time. Using more veggies doesn't alter the flavor balance all that much, but it adds portions in a healthy way.

Adapted from:
http://www.vegetariantimes.com/recipe/crispy-gnocchi-with-brussels-sprouts-and-mushrooms/
http://www.vegetariantimes.com/recipe/crispy-gnocchi-with-brussels-sprouts-and-mushrooms/
Wednesday, October 5, 2011
Spaghetti With Roasted Tomatoes & Herbs
12oz spaghetti
2 lbs cherry tomatoes
6 cloves garlic, smashed
3 Tbs olive oil, plus more for serving
Kosher salt and black pepper
1/2 cup chopped mixed fresh herbs (such as basil, parsley & chives)
shaved Parmesan, for serving
1) Heat oven to 400F. Cook the pasta according to the package directions; drain and return it to the pot.
2) Meanwhile, on a rimmed baking sheet, toss the tomatoes, garlic, 2 Tbs of the oil, 1/2 tsp salt and 1/4 tsp pepper. Roast, tossing once, until the tomatoes begin to burst, 20 to 25 minutes.
3) Toss the pasta with the tomatoes, herbs and the remaining Tbs of oil. Serve with the Parmesan and additional oil, if desired.
Review: Tasty! It's the second time this week that I roasted veggies, but tomatoes roast a lot faster than root vegetables. The tomatoes were actually done before the spaghetti, so they had to hang out for just a little bit. They tasted awesome and the herbs added a nice flavor. I used basil and parsley, but wish I had chives. I think the chives would have been a great final touch. I guess I know what to change next time!

Adapted from:
http://www.realsimple.com/food-recipes/browse-all-recipes/spaghetti-roasted-tomatoes
Monday, October 3, 2011
Autumn Vegetable Roast With Orzo
1 lb potatoes, diced into 1/2-inch pieces
1 lb cauliflower, cut into 1-inch pieces
8oz celery root, peeled and cut into 1/2-inch pieces
6 cloves garlic, minced
2 tsp herbes de Provence
4 Tbs olive oil, divided
1 12oz bunch kale, coarsely chopped
1 1/2 cups orzo pasta
1 15.5oz can chickpeas, rinsed and drained
3 Tbs finely chopped fresh parsley
1 Tbs aged balsamic vinegar
1) Place 1 oven rack in bottom one-third of oven and 1 rack in center of oven, and preheat oven to 400F. Spray 2 baking sheets with cooking spray.
2) Toss potatoes, cauliflower, celery root, garlic and herbes de Provence with 3 Tbs olive oil in bowl. Arrange vegetables on prepared baking sheets. Roast 1 hour, stirring occasionally and reversing positions of baking sheets halfway through.
3) Cook kale in large pot of boiling salted water for 5 minutes. Drain, and stir kale into vegetable mixture (in oven). Roast for 5 minutes more.
4) Cook orzo in pot of boiling salted water for 5 minutes. Add chickpeas, and cook 2 minutes. Drain, and transfer to bowl. Stir in parsley and remaining 1 Tbs oil. Season with salt and pepper, if desired. Serve orzo with vegetables, and drizzle with balsamic vinegar.
Review: Argh, I am so out of my routine! I didn't read this recipe prior to buying the ingredients. I was dismayed to find it needed to roast for an hour. On the flip side, Mike was happy to have a hot meal when he came home late from work! He doesn't like celery root, so I only served my portions with the celery root. The recipe had also called for fennel, which we both dislike, and onions (both should be roasted for an hour, if you choose to use them). And, I forgot to buy balsamic vinegar. So, my review kind of sounds like this was a failure. It wasn't. It was totally yummy, hearty and VERY filling. It would be even more yummy if I had balsamic vinegar. I can imagine how it would taste and it's delectable.

Adapted from:
http://www.vegetariantimes.com/recipe/autumn-vegetable-roast-with-orzo/
Sunday, October 2, 2011
Escarole With Caramelized Onions & Chickpeas
2 Tbs olive oil
1 large sweet onion (such as Vidalia; about 1 lb), thinly sliced
1 large bunch escarole (about 1 1/2 lbs), washed and torn into pieces
1/4 tsp salt
1 box penne
1 15.5oz can chickpeas, undrained
grated Parmesan cheese (optional)
1) Heat oil in 12-inch skillet over medium heat. Add onion and cook, stirring often, for 15 to 23 minutes or until golden. Lower heat if onion is browning too quickly.
2) Add escarole to skillet. Cook, turning occasionally, for about 6 minutes, until leaves are tender and stem ends are still crunchy. Sprinkle with salt.
3) Meanwhile, bring a large pot of salted water to a boil. Cook penne according to package directions, about 11 minutes. Drain, reserving 1/2 cup pasta water, and return pasta to pot.
4) Stir in chickpeas with their liquid. Simmer, stirring occasionally, for 3 minutes or until heated through. Serve over pasta, adding reserved pasta water if needed to thin sauce. Sprinkle with grated cheese, if desired.
Review: I have held on to this recipe for a couple of years now. I never saw escarole in Idaho. I knew it would be easy to find once I moved back to the East Coast. Happily, I added this dish to the menu for the week. It didn't disappoint, either! This was the first time I'd ever made escarole and it was surprisingly mild. It has a bit of a bitter taste, which was balanced by the caramelized onions. Unfortunately, I drained the chickpeas before noticing I needed the juice to make a sauce. Oops! So, this lacked a sauce, but ultimately was fine. It was tasty!!
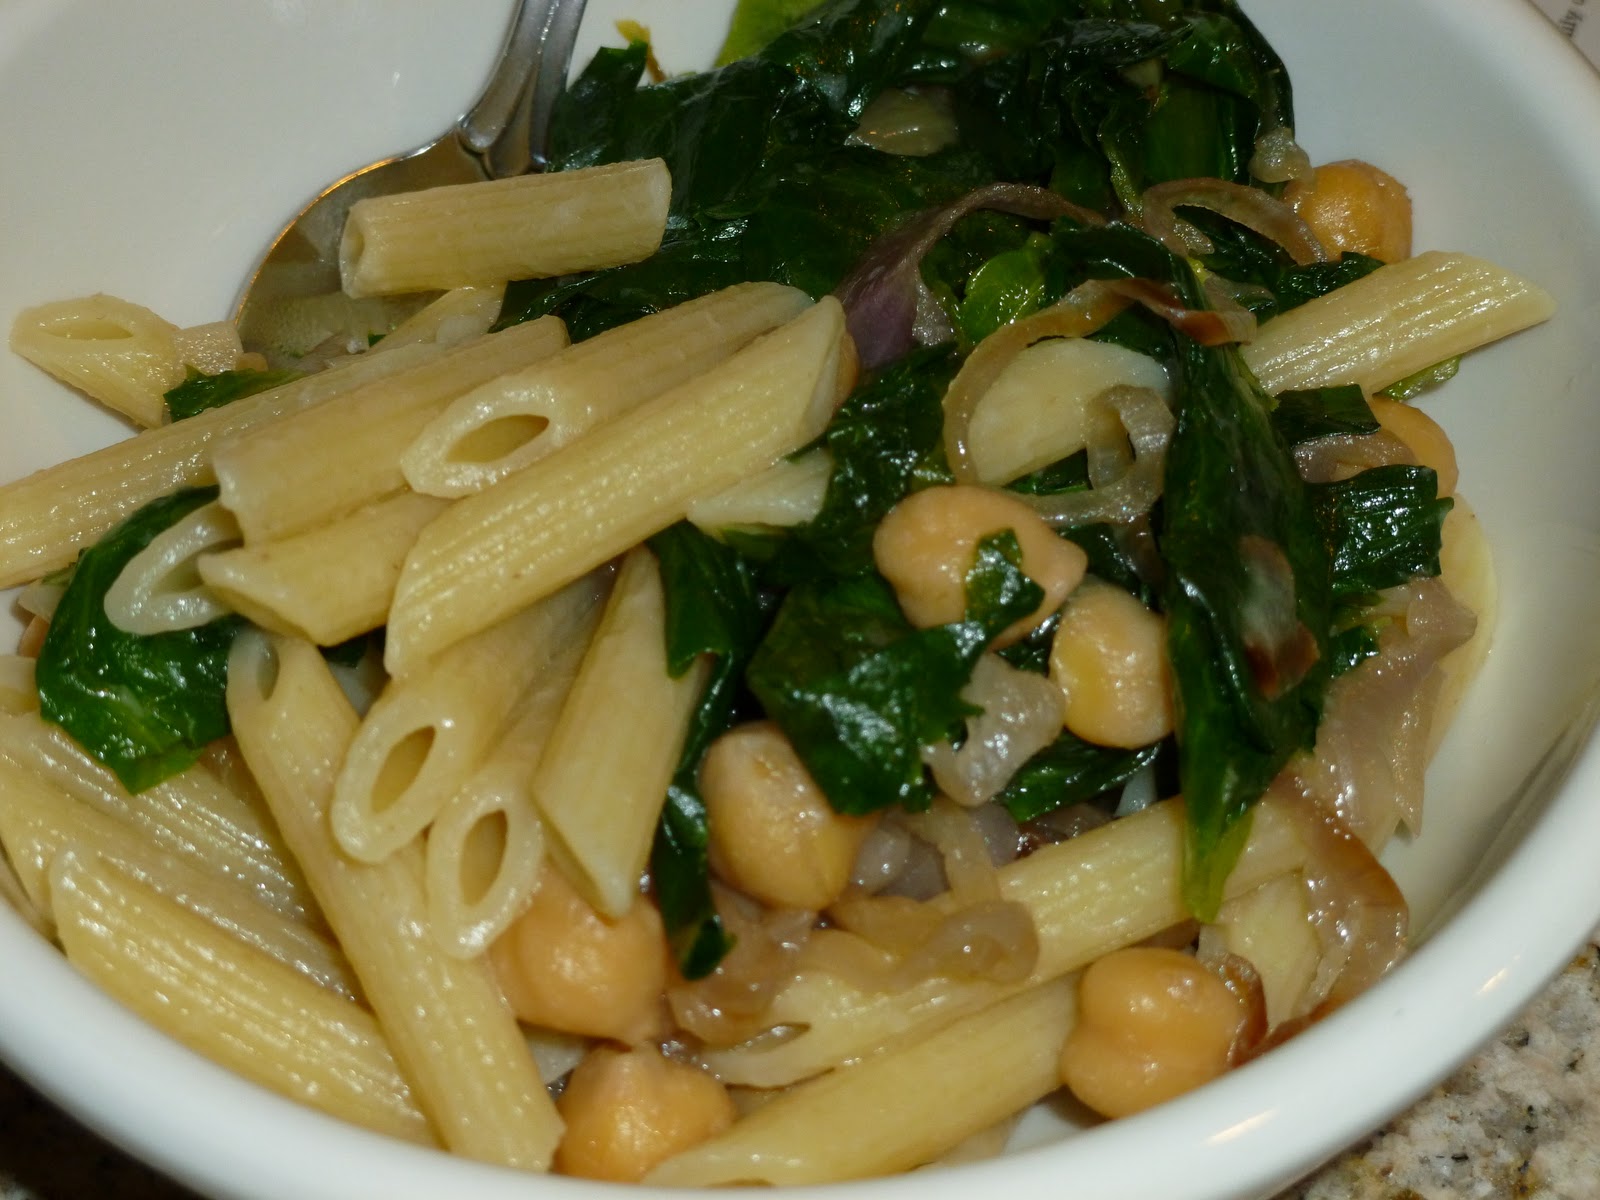
Adapted from:
http://www.familycircle.com/recipe/vegetables/escarole-with-caramelized-onions-chickpeas/
Tuesday, September 13, 2011
Cat Scratchers
So, new house = new cat problems. Almost right away, my youngest cat took to scratching the posts of the upstairs stairwell. Eek!! A renter's nightmare is their pets ruining the place, especially so soon after moving in!
So, I decided to buy an upright scratching post so she'd fill her need of scratching upright, but not on the house. Luckily, Petco was having a sale of buy one get one FREE! This lovely post was $17.99 and was made of sisal and seagrass. How eco-friendly!!

However, it was not liked. The base was so small that it'd tip over every time she'd start scratching. The last thing I needed was for her to become scared of her scratching post!! I researched online for some solutions and found NOTHING!! Luckily, I then stumbled across a link on how to make your own cardboard scratching posts. Both kitties LOVE their cardboard scratchers and then I had a genius idea. I'd make the bottom larger by making a cardboard scratching post on bottom! I knew it would help the post seem more familiar. So, I got out my hot glue gun and scavenged some boxes from the discarded moving box pile!


It was definitely a labor of love. This took me several days, several dozen glue sticks and the development of a bruise on my thumb pad due to cutting boxes with scissors. But, it was a success!! The base is much wider, and heavier now. My deviant kitty is now scratching this post all the time and I haven't heard any scratching on the stairs!!!! Now, do I go ahead and give the other post the same treatment?
Monday, September 12, 2011
Summer Harvest Pie
1 zucchini, diced
2 tomatoes, diced
1 cup corn
1/4 cup mayonnaise
1 handful basil, chopped
1 cup cheddar cheese, shredded
1/4 tsp ground chipotle or cayenne
2 pie crusts (preferably biscuit crust)
1) Preheat the oven to 350F. Prepare a pie plate by buttering the surface and laying one crust in the bottom.
2) In a large bowl, mix all the ingredients together (but not the pie crust!!).
3) Pour the mixture into the pie plate. Top with the second pie crust, crimping the edges to seal the pie. Cut slits into the top crust and brush with melted butter.
4) Bake for 30-40 minutes, until the top is golden brown and the filling is bubbling.
Review: This was AWESOME!!! Apparently corn and tomato pie is an end of season favorite. There's a nursery down the street from me that sells the pie. I found a recipe for this pie and tweaked it to include my zucchini. My garden is no longer producing, thanks to the tropical storms Irene and Lee. The basil turned black, the tomatoes fell off the vine (those that didn't were pecked by the yellow jackets) and the zucchini was flattened by the wind. The zucchini and tomatoes were the last to be salvaged before the storm. The tomatoes were perfect, so it was very disappointing that I won't be able to harvest any more!! And I was only able to salvage one handful of basil. The corn was just regular frozen corn from the store. But, it all came together in one savory dish! And, I doubled this, so I have filling in the freezer to make again in the future. Yum!!

Adapted from:
http://www.closetcooking.com/2011/09/corn-and-tomato-pie.html
Biscuit Crust
2 cups whole wheat flour
1 Tbs baking powder
3/4 tsp salt
6 Tbs butter, melted and cooled
3/4 cup milk
1) Mix the flour, baking powder and salt in a food processor.
2) Add the butter and pulse until it resembles coarse meal.
3) Add the milk and pulse until it forms a dough.
4) Split the dough in half and roll out each on a well floured surface one at a time.
5) When baking this pie crust, brush the top with melted butter or an egg wash, slit some holes in it and bake as per the pie instructions. If baking at 350F for longer than 20-30 minutes, you can loosely cover the top with foil for all but the last 20 minutes to keep it from getting too dark.
Review: This recipes makes 2 crusts, so it's perfect for savory dishes that need a top crust!
Adapted from:
http://www.closetcooking.com/2011/09/biscuit-pie-crust.html
Spiced Apple Bars
4 cups all-purpose whole wheat flour
1/2 cup white sugar
1/2 cup brown sugar
4 tsp baking powder
1 tsp salt
1 tsp ground cinnamon
1/2 tsp ground cloves
1/2 tsp ground allspice
1 large egg, lightly beaten
1/4 cup unsalted butter, melted and cooled
1 tsp vanilla extract
1 1/2 cups milk
3 cups apples (cored, peeled and diced)
1) Preheat oven to 350F. Prepare a 9x13 pan by buttering the bottom and sides.
2) In a large bowl, whisk together the dry ingredients (flour, white sugar, brown sugar, baking powder, salt, cinnamon, cloves and allspice).
3) In a separate bowl, whisk together the wet ingredients (egg, buter, vanilla and milk).
4) Stir the wet ingredients into the dry ingredients. Mix in the fruit.
5) Bake for 70 minutes, or until a toothpick inserted into the center comes out clean. Let cool before serving.
Review: I had lots of leftover apples from making pie this weekend. I wanted to make apple bread, but found I did not have vegetable oil in the house. I googled recipes for bread that didn't use oil. I found a recipe for "quick bread." The name was quite a misnomer! I tweaked it to use more fruit than it called for (as I had lots of apples) and made it in a flat pan, as I knew the extra fruit would not be conducive to rising in a loaf pan. It turned out juuuuuust fine! Though, this is best served with butter slathered on it. Yum!!

Sunday, September 11, 2011
Apple Pie
I have a new quest to make more pies. I received all sorts of pie related gifts for my birthday (yay!!) and had an opportunity to bring pie to a family function today. Unfortunately, I didn't get to try a new fancy flavor, as I know my nieces aren't fond of crazy gourmet flavors. So, apple pie it was! I bought a bag of Macintosh apples from the grocery store, though they are local New York grown apples. Therefore, they were small and I ended up coring, peeling and slicing apples for an hour!
I also tweaked my homemade crust recipe, as I don't like using vegetable shortening. I substituted butter, after researching if it would work with butter instead. I got a yes, but no further tips. My recipe calls for refrigerating the dough for 4 hours. I did, but when it's made with butter . . . yeah, I had two solid balls of crust dough. Ug. I popped them in the microwave for 30 seconds and cursed myself for not thinking the plan through. If I use butter, I no longer need to refrigerate the dough.
As for the pie itself, I seem to have significant difficulty following recipes for apple pie. I have a basic recipe that I use, so that I don't forget essential things like lemon juice and flour. I also reference it to know what temp to use and how long to bake the pie. The rest I make up as I go along. So, this pie was made using apples, brown sugar (brownulated - an interesting concept), cinnamon, allspice, ground clove, agave syrup, butter, flour and lemon juice. I didn't even measure the ingredients, just adding amounts that looked right.
But, it seemed to work out fine. Everyone raved about the pie and there were absolutely no leftovers!!

Sunday, August 14, 2011
Stuffed Greek-Style Zucchini
1 cup instant brown rice
3 large zucchini, ends cut off and halved lengthwise
1 Tbs olive oil
10oz white mushrooms, chopped
4 cloves garlic, minced
2 tsp dried dill
2 Tbs chopped fresh mint
salt and pepper
1 28oz can diced tomatoes
1/2 cup crumbled feta
1) Cook rice according to package directions. Set aside.
2) Preheat oven to 375F. Scoop out centers of zucchini (the seeds and fleshy white part), leaving the non-seed containing part intact. Ensure that the ends are not scooped, essentially making the zucchini halves into bowls. Discard the centers.
3) Warm oil in a skillet over medium-high heat. Add the mushrooms and garlic; saute for 4 minutes. Stir in cooked rice, dill and mint; cook for 1 minute. Season with salt and pepper, and remove from heat.
4) Spread tomatoes in a 9x13 inch baking dish. Fill zucchini with rice mixture and place in baking dish. Top with feta. Bake until zucchini is tender, about 40 minutes.
Review: My garden has received a TREMENDOUS amount of rain. Despite my frequent harvests, I still managed to have two gigantic zucchinis:
 These aren't good for your average dish, as the seeds get too big and the squash can be too hard. Many people grind these up for use in zucchini bread. However, I have a difficult time baking goodies when we're trying so hard to eat healthy. Therefore, I remembered a past co-worker talking about stuffing them and I looked through my recipe collection for inspiration. I tweaked the one I found and this was the end result. My two zucchinis were too big to fit all four halves into one pan, so I made a pan for the last piece out of aluminum foil. That should have been an indicator that they there were actually too big to eat. :( The skin was too tough and was quite squeaky when chewing. The filling was absolutely delicious, so we ate that and ditched the zucchini. The taste with the zucchini was pretty tasty, so it will be made again using zucchini that's smaller than these monsters!

3 large zucchini, ends cut off and halved lengthwise
1 Tbs olive oil
10oz white mushrooms, chopped
4 cloves garlic, minced
2 tsp dried dill
2 Tbs chopped fresh mint
salt and pepper
1 28oz can diced tomatoes
1/2 cup crumbled feta
1) Cook rice according to package directions. Set aside.
2) Preheat oven to 375F. Scoop out centers of zucchini (the seeds and fleshy white part), leaving the non-seed containing part intact. Ensure that the ends are not scooped, essentially making the zucchini halves into bowls. Discard the centers.
3) Warm oil in a skillet over medium-high heat. Add the mushrooms and garlic; saute for 4 minutes. Stir in cooked rice, dill and mint; cook for 1 minute. Season with salt and pepper, and remove from heat.
4) Spread tomatoes in a 9x13 inch baking dish. Fill zucchini with rice mixture and place in baking dish. Top with feta. Bake until zucchini is tender, about 40 minutes.
Review: My garden has received a TREMENDOUS amount of rain. Despite my frequent harvests, I still managed to have two gigantic zucchinis:


Subscribe to:
Comments (Atom)